
My text editor of choice has been Visual Studio Code for a long time. One of the great things about it is that there are a lot of customization options available.
After six years of using it, I wanted to change things up a little and create my own color theme. In this short blog post I'm going to describe what's the easiest way to do that.
Create the .json file
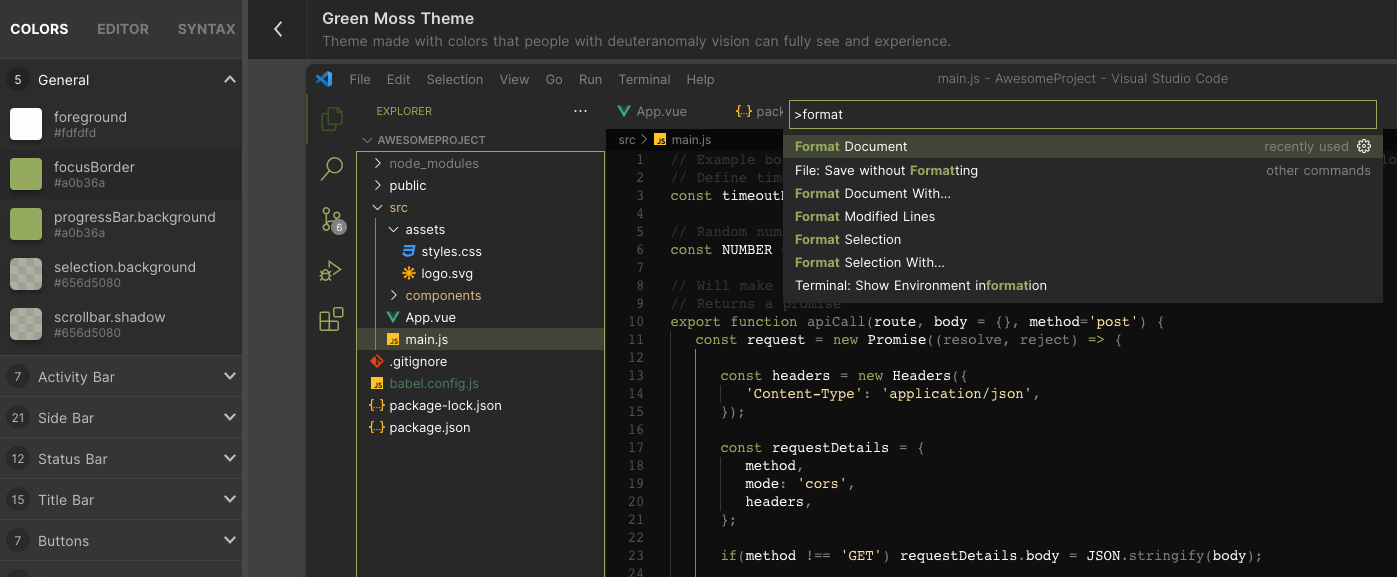
There are various ways to create a vscode color theme. But the easiest by far is to use this UI Helper. Huge thanks to Mike for his work here! This tool makes the process of creating themes a joy. We can use the UI to pick colors for all of the configuration points, and we will have an instant visual feedback. Here's a screenshot of this great tool:
When we choose all the colors and finish the customization, all we need to do is generate and download the .json file. That can be done by clicking the download button in the UI. This is the core file for our future color theme.
The most important and time consuming step is over. Now we just need to deal with the boilerplate logic and the deployment.
Generate theme boilerplate
Now we need to create a repo that will contain all the necessary files that a vscode plugin must have. For that we will use yeoman and vscode's official generator. We need to run the following:
npm install -g yo generator-code
yo code
The first command installs the two mentioned packages globally. The second command starts a process of generating the boilerplate by posting several questions. We can answer those in the terminal. It's pretty straightforward. We just need to choose: New Color Theme -> No, start fresh, and then choose the name of the theme. When we answer all of the question the yeoman's vscode generator plugin will create the needed boilerplate project for us. The directory will look something like this:
.vscode/
themes/
.gitattributes
.gitignore
.vscodeignore
CHANGELOG.md
package.json
README.md
vsc-extension-quickstart.md
The most important thing in this step is to copy the downloaded .json file from the Step 1 into the themes/ directory.
At this point we have a functioning theme! We can test it immediately. We just need to open the repo via vscode and activate the debugger by pressing the F5 button. We can now see how the theme looks after our initial customization. We can make some small tweaks directly in the .json file if needed.
Steps described here can also be found on the official docs.
Optional: Configure package.json
An optional thing to do is to fill in some metadata so our theme is discoverable in the vscode store. Two files are important here. First one is the package.json. In this file we can set various properties, the most important are:
- theme name - main unique identifier
- description - people will read the description for sure
- author - put your name here
- keywords - these are very important for the searching
Keywords are maybe the most important thing to set. Because they will make our theme pop up in the search results when someone is browsing for extensions in the vscode store. So we should basically put there all the words that are associated with our theme. This is how the package.json file should look after:
{
  "name": "my-awesome-theme",
  "displayName": "My Awesome Theme",
  "description": "A cheerful and awesome vscode color theme based on the colors of the rainbow",
  "version": "0.0.1",
  "publisher": "DarkMannn",
  "author": "DarkMannn <darko.milosevic@darkmannn.dev>",
  "engines": {
    "vscode": "^1.74.0"
  },
  "categories": ["Themes"],
  "keywords": ["theme", "rainbow", "happy", "cheerful", "cheer", "dark"],
  "contributes": {
    "themes": [
      {
        "label": "My Awesome Theme",
        "uiTheme": "vs-dark",
        "path": "./themes/my-awesome-theme-color-theme.json"
      }
    ]
  },
  "repository": {
    "url": "https://github.com/DarkMannn/my-awesome-theme-vscode-theme",
    "type": "git"
  },
  "bugs": {
    "url": "https://github.com/DarkMannn/my-awesome-theme-vscode-theme/issues"
  }
}
Optional: Configure README.md
The second file that we can configure to make our theme standout from the rest is the README.md. Whatever we put here will be shown as a landing page for everyone who finds this theme in the store. We can put literally anything here, but I think that the things that will prove useful are:
- code snapshot - a very useful thing that allows users to see how the theme looks before clicking the install button
- installation instructions - useful for the people that don't find the theme in vscode itself, but via the vscode website
- link to the issues page - people can use this to submit bugs to us
Publish the theme
This last step is described in great detail in the official docs. But I'm gonna explain the gist here.
Every created vscode extension, included color themes, needs to be published to the official vscode marketplace. Visual Studio Code uses Microsoft's Azure cloud platform for it's marketplace. So there we would need to do the following there:
- create an account - self explanatory
- create an organization - Azure's way to connect multiple projects logically
- create a personal access token - we need it to authenticate to Azure via our CLI
All of these steps are described in great detail in the provided link. ☝️
When we do all of this, we just need to deploy the theme from our CLI. For that we will use the vsce (i.e. Visual Studio Code Extensions) plugin from npm. All of the commands that we need to execute are the following:
npm install -g @vscode/vsce
cd OUR_EXTENSION_DIRECTORY
vsce login OUR_PUBLISHER_NAME_FROM_AZURE
vsce package
vsce publish
Congratulations! We now have a color theme that's officially published. The only thing left to do is notify the community and share. 🙌